How to Design a Backyard Fire Pit Area: A Step-by-Step Guide for Spokane Homeowners
Learning how to design a backyard fire pit area starts with understanding your property, your climate, and your local codes. A well-planned fire pit transforms an ordinary yard into a gathering space your family and guests will use from spring through fall, and even on mild winter evenings. Here in Spokane, freeze-thaw cycles, burn regulations, and seasonal weather all shape the decisions you’ll make. We’ve helped homeowners across the region build fire pit areas that last, and in this guide we’ll walk you through every step from site selection to the finishing touches.
Planning Your Fire Pit Area: Location, Safety, and Local Considerations
The first decision is where to put your fire pit. Place it on level ground at least 10 feet from structures, fences, and overhanging trees. Most building codes and home insurers cite 10 feet as the minimum clearance, and we recommend treating that as a starting point rather than a target.
Before you dig, call 811 to locate underground utilities. This is required across the US and free of charge. Hitting a gas or irrigation line is dangerous, expensive, and completely avoidable.
Spokane has specific rules you need to follow. The Spokane Regional Clean Air Agency enforces open burning restrictions and seasonal burn bans. Check current regulations for allowable fuel types, required spark arrestors or screens, and pit size limits. Wood-burning pits face tighter restrictions than gas models, especially during poor air-quality days.
Avoid placing your pit directly under power lines, low-hanging branches, or decorative string lights. Radiant heat rises and can damage anything overhead. Surround the pit with a non-combustible surface, gravel, pavers, or concrete, extending at least three feet in every direction. Bare grass or mulch near an open flame is a fire hazard.
We always tell clients to think about wind patterns, too. If your yard funnels wind from a consistent direction, position seating upwind so smoke blows away from guests.
Choosing the Right Fire Pit Style for Your Outdoor Living Space
Your fire pit style sets the tone for the entire outdoor living area. Here are the most common options we install and recommend:
Wood-burning masonry ring. Built from stone or concrete blocks, typically 12–18 inches high and 30–44 inches in diameter. This is the classic campfire look, and it pairs well with gravel pads or paver patios. It does produce smoke, so placement and local burn rules matter.
Metal bowl or prefabricated kit. These are fast to install and often portable. A steel bowl on a gravel pad gives you flexibility, you can move it or store it in winter. Kits with interlocking blocks can be assembled in a single afternoon.
Gas or propane fire pit table. Cleaner burning, no smoke, and easy to control with a switch. Gas models may require a professional gas line installation, which adds cost but eliminates the need for firewood storage. Propane versions use a hidden tank and need no permanent gas connection.
Smokeless steel fire pits. Engineered airflow systems reduce smoke significantly. These are popular with homeowners who want the wood-burning experience without irritating neighbors or triggering burn-ban concerns.
Each style fits a different budget and lifestyle. We help clients match the right fire pit to their property size, entertaining habits, and long-term outdoor living goals.
Preparing the Ground and Installing Your Fire Pit
Proper ground preparation is what separates a fire pit that lasts from one that shifts, cracks, or floods after its first winter.
Start by marking your circle. Drive a center stake, attach a string cut to your desired radius, and trace the outline with spray paint. Remove all sod, weeds, and large rocks within the marked area. Dig down 4–6 inches to create a stable base.
Level the exposed soil and compact it firmly with a hand tamper or plate compactor. Uneven ground leads to uneven block courses, and blocks that aren’t level will eventually separate.
For the seating and walkway zones around the pit, lay landscape fabric to suppress weed growth. Don’t place fabric directly beneath a wood-burning fire pit basin, heat can damage it. Add 2–4 inches of compacted gravel as your base layer. For seating areas, pea gravel at 2–3 inches deep provides good drainage and a clean look.
When you build the pit itself, dry-fit the first course of blocks in a circle to check spacing and alignment. Confirm everything is level, then secure blocks with outdoor construction adhesive as the manufacturer recommends. Stack additional courses, staggering joints for strength.
Selecting Materials That Withstand Spokane’s Climate
Spokane’s winters bring freezing temperatures, snow, and repeated freeze-thaw cycles. Material selection matters more here than in milder climates.
Use frost-resistant concrete pavers or natural stone rated for freeze-thaw conditions. Cheap, non-rated blocks can crack and spall after one winter. We stock and install materials specifically chosen for this region’s weather.
For metal fire pits, choose galvanized or high-temperature painted steel. Cover portable pits or store them in a garage during winter to limit rust. Moisture and road salt residue accelerate corrosion on unprotected metal.
Pea gravel and crushed rock drain well and handle snow and ice far better than bare soil. Standing water that freezes around your pit base causes heaving and structural damage. Good drainage is non-negotiable.
Use exterior-grade, UV-resistant finishes and fabrics on any nearby furniture. Spokane summers bring strong sun, and unprotected cushions and wood fade quickly.
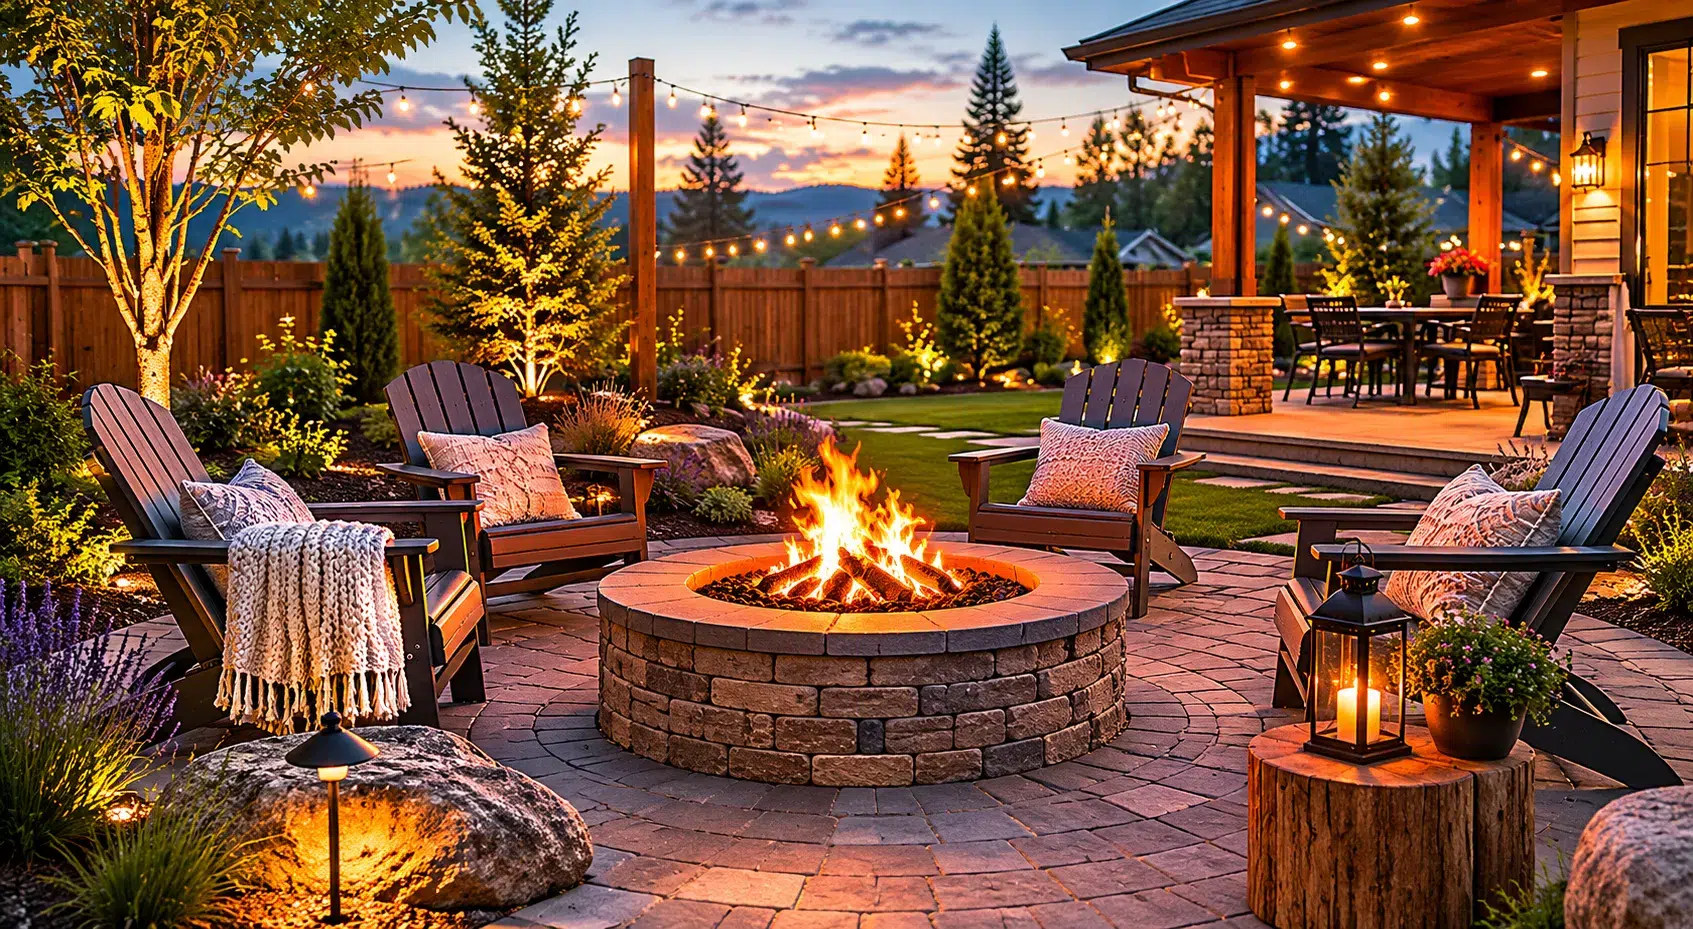
Seating, Lighting, and Finishing Touches
A fire pit area isn’t complete without comfortable seating and good lighting. These finishing touches turn a functional space into one people actually want to spend time in.
Choose nonflammable or fire-resistant seating. Adirondack chairs, masonry benches, and concrete seat walls all work well. Keep seating 3–5 feet from the pit edge. Closer than that and the heat becomes uncomfortable: farther away and you lose the warmth.
Low-voltage or solar path lights work best outside the heat zone. Place them along walkways leading to the fire pit area so guests can navigate safely after dark. If you want string lights overhead, route them well clear of rising heat, melted wiring is a real hazard we’ve seen on DIY projects.
Add practical extras like side tables for drinks, a dedicated firewood rack for wood-burning pits, and a fitted metal screen with a snuffer lid. The screen keeps embers contained. The lid lets you extinguish the fire quickly and keeps rain out of the pit between uses.
Fire Pit Ideas Spokane Homeowners Love
Over 25 years of landscape work in Spokane, we’ve seen which fire pit ideas hold up best in this climate and which designs clients enjoy most.
Circular pea-gravel pad with a central pit. A stone-edged gravel circle with a wood-burning or smokeless steel pit in the center is one of the most popular requests we get. It drains well, looks clean, and costs less than a full paver patio. Neighborhoods like South Hill and Five Mile see a lot of these.
Gas fire pit integrated into a paver patio. For homeowners who want a multi-season outdoor living space, a gas fire pit built into an existing or new paver patio is hard to beat. Low smoke, instant on-off, and usable well into November.
Built-in curved seat walls. A low stone wall that curves around the fire pit provides permanent seating that handles snow, doesn’t blow over in wind, and requires zero storage. Paired with a gravel or paver floor, this setup handles Spokane’s drainage demands without issue.
At Greenscape Landscaping, we design and install all three of these configurations. We handle everything from initial layout and material sourcing to final construction, so you get a fire pit area built to last.
Build a Fire Pit Area That Works for Your Spokane Property
A great backyard fire pit area comes down to smart planning: safe clearances, code-compliant materials, proper drainage, and finishes that survive Spokane’s freeze-thaw cycles. Start with the right location, choose materials rated for the climate, and don’t skip the base preparation.
If you’d rather have professionals handle the project, contact our team at Greenscape for a free consultation. We’ve been building outdoor living spaces across Spokane for over 25 years.